用matplotlib.pyplot法

基本用法

画简单的函数图像:

1
2
3
4
5
6
import matplotlib.pyplot as plt
import numpy as np
x=np.linspace(-1,1,50)
y=2*x**2+1
plt.plot(x,y)
plt.show()

图像效果:

img

Figure的使用:

figure就是不同的图片窗口,一个figure管它下面的一段代码

1
2
3
4
5
6
7
8
9
10
11
12
13
14
15
16
import matplotlib.pyplot as plt
import numpy as np

x=np.linspace(-3,3,50)
y1=2*x**2+1
y2=x**3-1

plt.figure() # 先定开头,后面的内容都是和这个figure有关
plt.plot(x,y1)

plt.figure(num=3,figsize=(8,5))
# 第二个figure,就是第二个图片窗口,可以通过num=设置编号数字,size设置长宽大小
plt.plot(x,y2)
plt.plot(x,y1,color='red',linewidth=2.0,linestyle='--') # 一个figure可以同时把两个函数画进来,且可以设置颜色粗细样式

plt.show()

图片效果:

img

坐标轴操作

坐标轴设置1:

1
2
3
4
5
6
7
8
9
10
11
12
13
14
15
16
17
18
19
20
21
22
23
24
25
26
27
28
29
30
31
import matplotlib.pyplot as plt
import numpy as np

x = np.linspace(-3, 3, 100)
y1 = 2 * x ** 2 + 1
y2 = x ** 3 - 1

plt.figure(num=3, figsize=(8, 5))
plt.plot(x, y2)
plt.plot(
x, y1, color="red", linewidth=2.0, linestyle="--"
) # 一个figure可以同时把两个函数画进来,且可以设置颜色粗细样式

plt.xlim((-3, 4)) # x轴显示数据范围
plt.ylim((-3, 5)) # y轴显示数据范围

plt.xlabel("I am X") # x轴名称
plt.ylabel("I am Y") # y轴名称

# 坐标轴标尺转换
new_ticks = np.linspace(-1, 2, 5) # 从-1到2,平均取5个刻度[-1. -0.25 0.5 1.25 2. ]
plt.xticks(new_ticks)

plt.yticks(
[-3, -2, 0, 0.3, 1],
["bad", "normal", r"$good\ \alpha$", r"$well\ done$", "excellent"],
)
# 对应替代数字标尺,并且会扩大显示范围
# 正则写法--变斜体好看一点,反斜杠转译,直接写空格无法识别,alpha可转译,

plt.show()

图片效果:

img

坐标轴(图片框架)操作:

1
2
3
4
5
# gca='get current axis'
ax=plt.gca()
# 把坐标轴(脊梁)拿出来
ax.spines['right'].set_color(None)
ax.spines['top'].set_color(None)

效果:(top和right框架被none了)

img

还可以移动x和y轴:

1
2
3
4
5
6
7
8
9
10
11
12
13
14
15
16
17
18
19
20
21
22
23
24
25
26
27
28
29
30
31
32
33
34
35
36
37
38
39
40
41
42
import matplotlib.pyplot as plt
import numpy as np

x = np.linspace(-3, 3, 100)
y1 = 2 * x ** 2 + 1
y2 = x ** 3 - 1

plt.figure(num=3, figsize=(8, 5))
plt.plot(x, y2)
plt.plot(
x, y1, color="red", linewidth=2.0, linestyle="--"
) # 一个figure可以同时把两个函数画进来,且可以设置颜色粗细样式

plt.xlim((-3, 4)) # x轴显示数据范围
plt.ylim((-3, 5)) # y轴显示数据范围

plt.xlabel("I am X") # x轴名称
plt.ylabel("I am Y") # y轴名称

# 坐标轴标尺转换
new_ticks = np.linspace(-1, 2, 5) # 从-1到2,平均取5个刻度[-1. -0.25 0.5 1.25 2. ]
plt.xticks(new_ticks)

plt.yticks(
[-3, -2, 0, 0.3, 1],
["bad", "normal", r"$good\ \alpha$", r"$well\ done$", "excellent"],
)
# 对应替代数字标尺,并且会扩大显示范围
# 正则写法--变斜体好看一点,反斜杠转译,直接写空格无法识别,alpha可转译,

# gca='get current axis'
ax=plt.gca()
# 把坐标轴(脊梁)拿出来
ax.spines['right'].set_color(None)
ax.spines['top'].set_color(None)
ax.xaxis.set_ticks_position('bottom') # 让bottom轴可以动起来,把x轴设置成bottom轴了
ax.yaxis.set_ticks_position('left')
ax.spines['bottom'].set_position(('data',-1)) # 将bottom轴(x轴)设置在了data值(y的值)为-1的位置上
ax.spines['left'].set_position(('data',1)) # 这里参数定位的方式有很多种,outward,axes之类的


plt.show()

最终图片效果:

img

给图片打上图例

1
2
3
4
5
6
7
8
9
10
11
12
13
14
15
16
17
18
19
20
21
22
23
import matplotlib.pyplot as plt
import numpy as np

x = np.linspace(-3, 3, 100)
y1 = 2 * x ** 2 + 1
y2 = x ** 3 - 1

plt.xlim((-3, 4))
plt.ylim((-3, 5))
plt.xlabel("I am X")
plt.ylabel("I am Y")
new_ticks = np.linspace(-1, 2, 5)
plt.xticks(new_ticks)
plt.yticks(
[-3, -2, 0, 0.3, 1],
["bad", "normal", r"$good\ \alpha$", r"$well\ done$", "excellent"],
)

plt.plot(x, y2,label='up') # label给线增加图例,再用legend给plt加上图例
plt.plot(x, y1, color="red", linewidth=2.0, linestyle="--",label='down')
plt.legend()

plt.show()

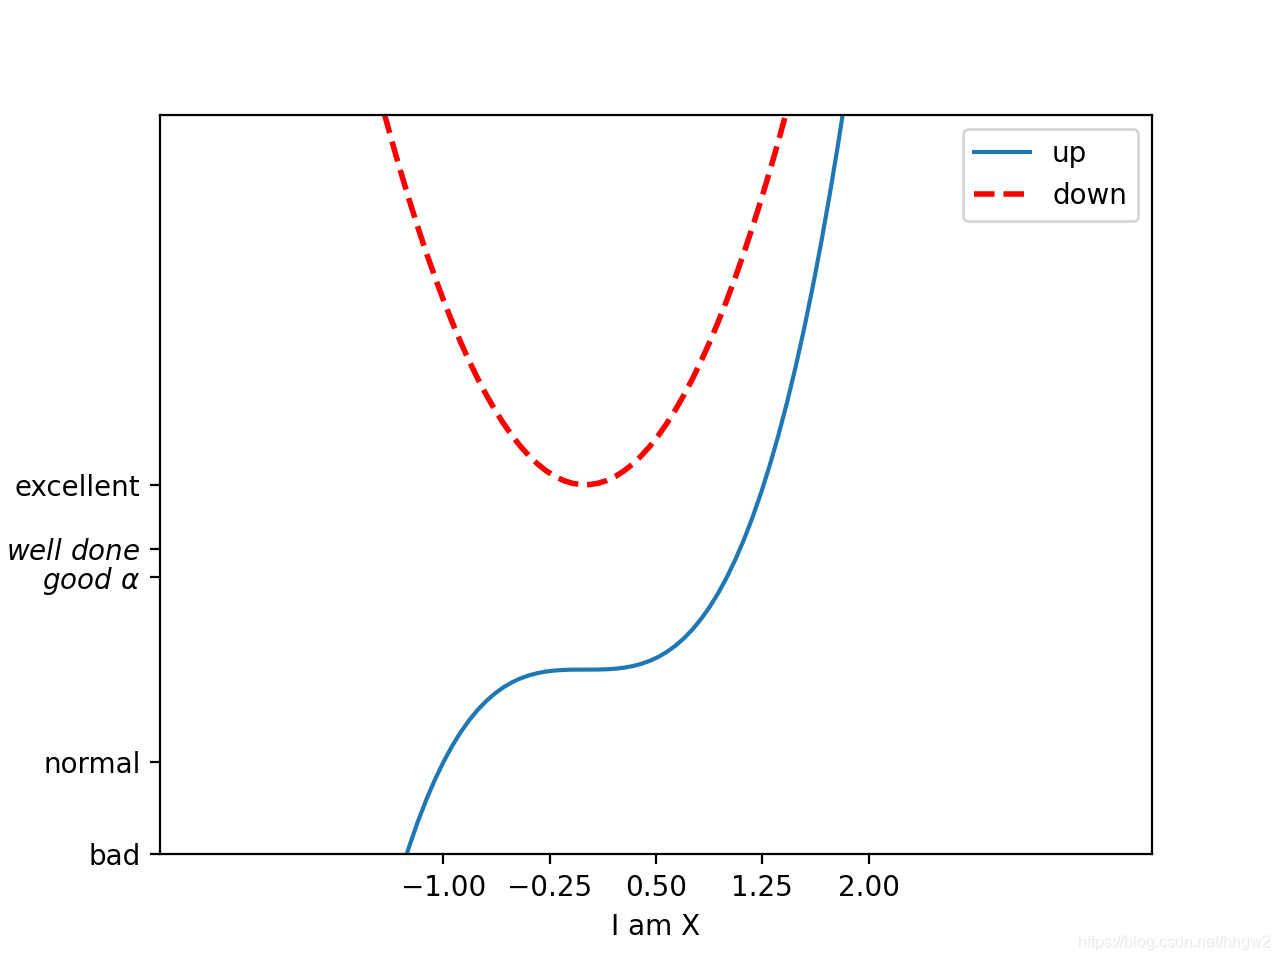
图片效果:

img

legend的参数使用:

1
2
3
4
5
l1,=plt.plot(x, y2,label='up') # label给线增加图例,再用legend给plt加上图例
l2,=plt.plot(x, y1, color="red", linewidth=2.0, linestyle="--",label='down')
plt.legend(handles=[l1,l2,],labels=['aaa','bbb'],loc='best')
# handles可以选择要显示哪几个图例,但是传值需要前面变量加逗号获取plot返回值,
# labels可以对标签重新命名,也可以少写几个就会少打印几个图例,loc可以选择最best的地方添加图例。

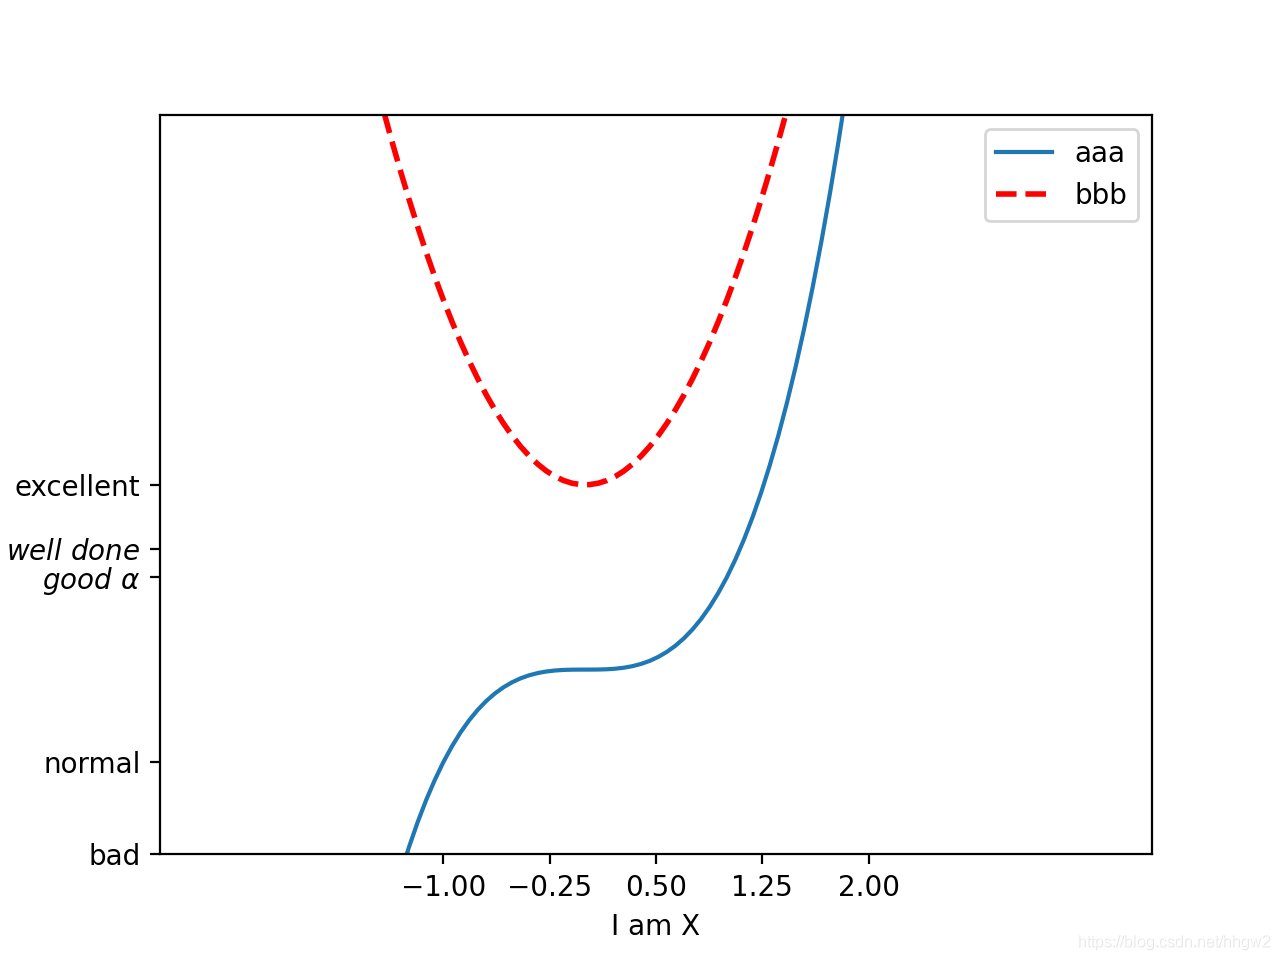
使用效果:

img

在线条上标注

1
2
3
4
5
6
7
8
9
10
11
12
13
14
15
16
17
18
19
20
21
22
23
24
25
26
27
28
29
30
31
32
33
34
35
36
37
38
39
40
41
42
43
44
45
46
47
48
49
import matplotlib.pyplot as plt
import numpy as np

x = np.linspace(-3, 3, 100)
y = 2 * x + 1

plt.figure(
num=1,
figsize=(8, 5),
)
plt.plot(
x,
y,
)

ax = plt.gca()
ax.spines["right"].set_color("none")
ax.spines["top"].set_color("none")
ax.xaxis.set_ticks_position("bottom")
ax.spines["bottom"].set_position(("data", 0))
ax.yaxis.set_ticks_position("left")
ax.spines["left"].set_position(("data", 0))

x0 = 1
y0 = 2 * x0 + 1
plt.scatter(x0, y0) # plt.plot()画线,plt.scatter()画点
plt.plot([x0, x0], [y0, 0], "k--", lw=2) # [],[]前面一个代表横坐标变化,后面一个代表纵坐标变化,k--黑色虚线 lw线的宽度

plt.annotate(
r"$2x+1=%s$" % y0,
xy=(x0, y0),
xycoords="data",
xytext=(+30, -30),
textcoords="offset points",
fontsize=16,
arrowprops=dict(arrowstyle="->", connectionstyle="arc3,rad=.2"),
)
# 增加箭头和函数表达式标注,感觉还不如ps,参数太多太鸡肋

plt.text(
-3.7,
3,
r"$This\ is\ the\ some\ text.\ \mu\ \sigma_i\ \alpha_t$",
fontdict={"size": 14, "color": "r"},
)
# 在左侧添加一串红色字,一堆转译,_代表角标


plt.show()

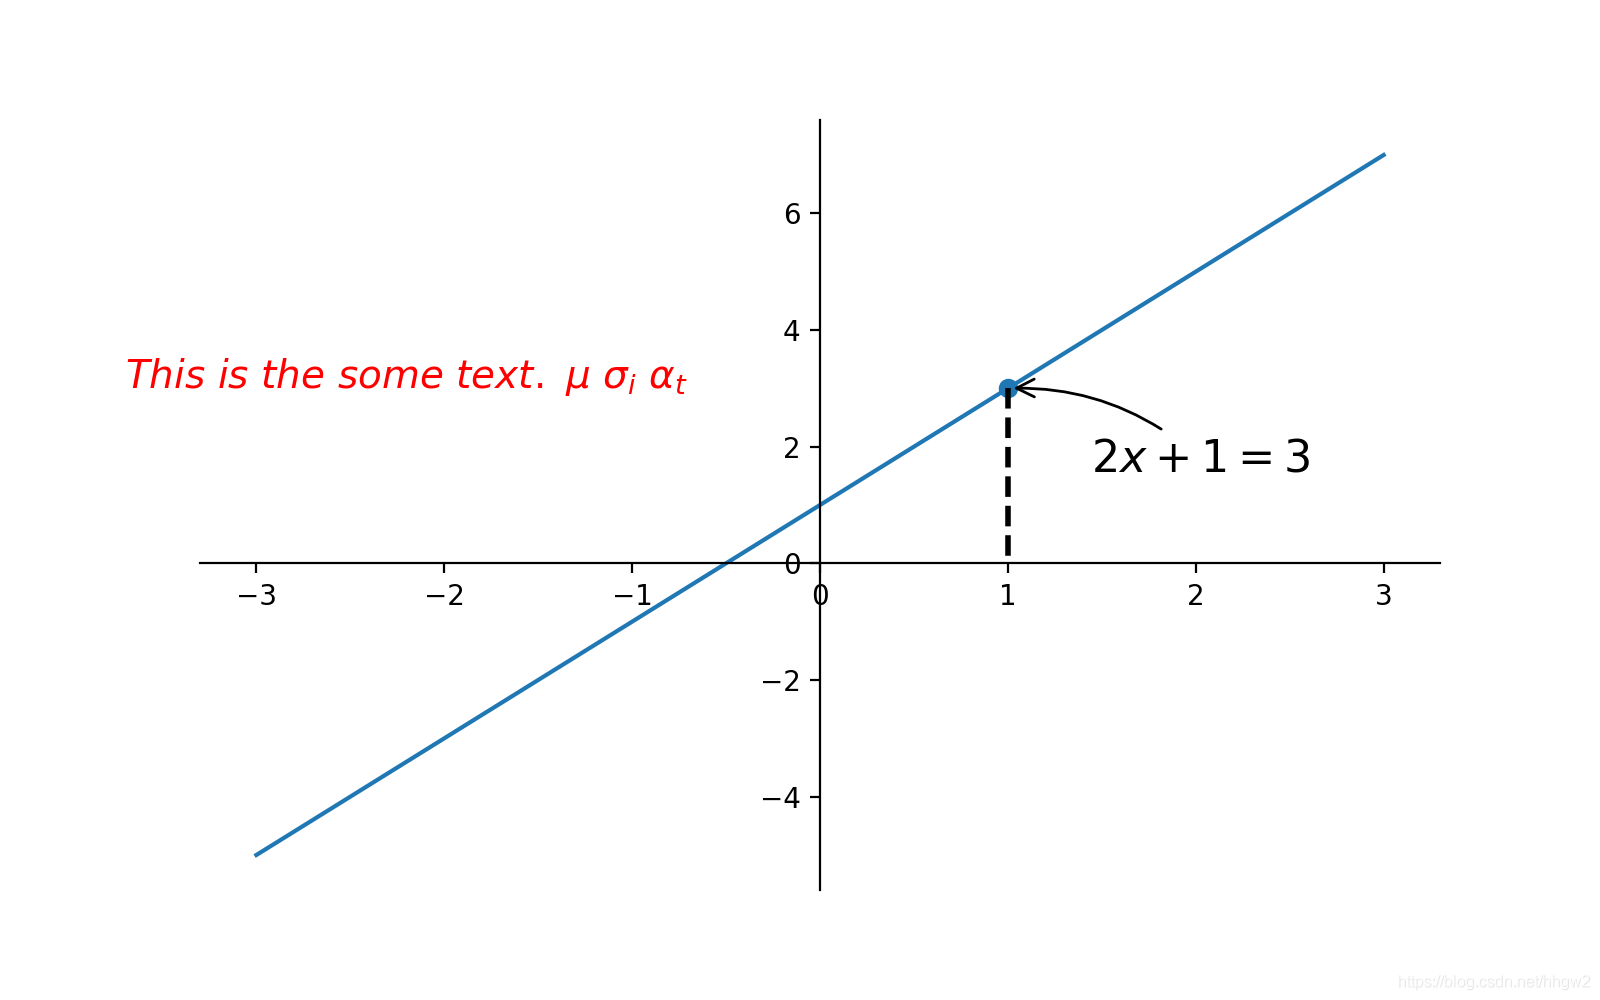
最终效果:

img

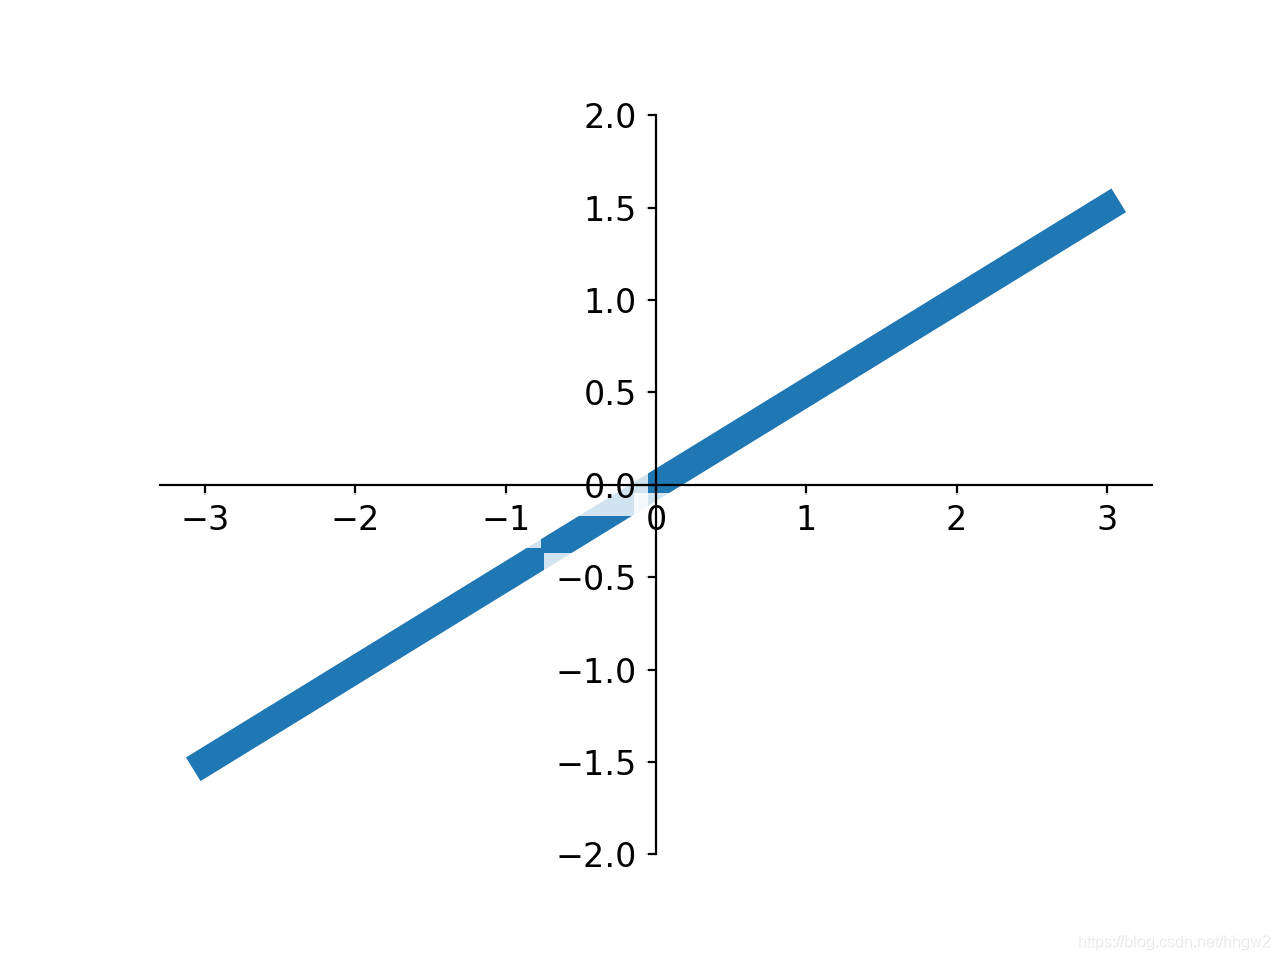
线太多太粗坐标轴标尺被挡住了?

1
2
3
4
5
6
7
8
9
10
11
12
13
14
15
16
17
18
19
20
21
22
23
24
25
26
27
28
29
import matplotlib.pyplot as plt
import numpy as np

x = np.linspace(-3, 3, 100)
y = 1/2 * x

plt.figure()
plt.plot(
x,
y,
linewidth=10,
zorder=1
)
plt.ylim(-2,2)
ax = plt.gca()
ax.spines["right"].set_color("none")
ax.spines["top"].set_color("none")
ax.xaxis.set_ticks_position("bottom")
ax.spines["bottom"].set_position(("data", 0))
ax.yaxis.set_ticks_position("left")
ax.spines["left"].set_position(("data", 0))

for label in ax.get_xticklabels()+ax.get_yticklabels():
label.set_fontsize(12)
label.set_bbox(dict(facecolor='white',edgecolor='None',alpha=0.8)) # alpha是透明度,越大越不透明,白色的底色
label.set_zorder(2) # 图层顺序,第二层在第一层上面,所以比原来的label更优先显示


plt.show()

效果如下:

img

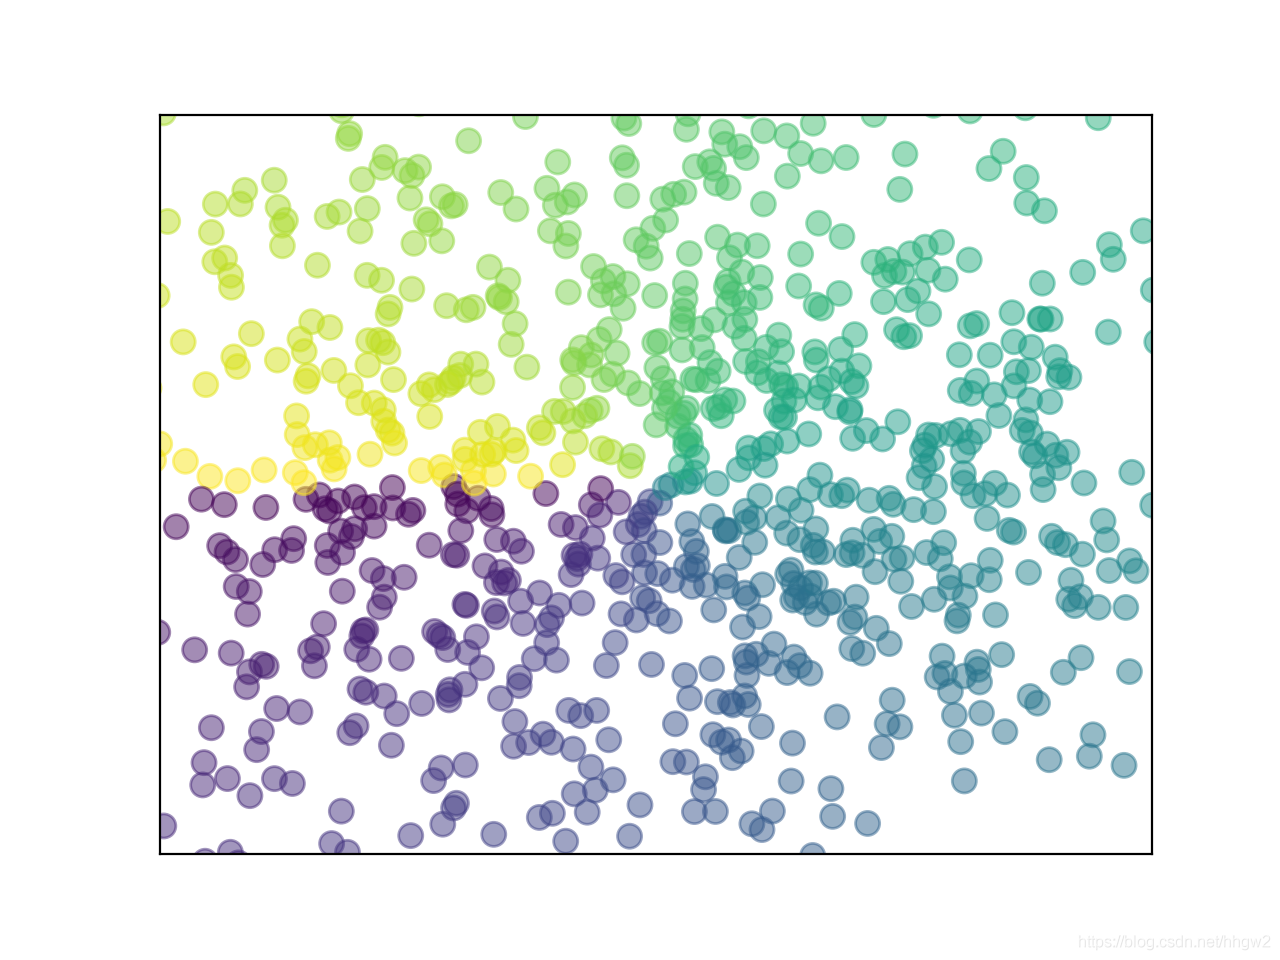
散点图的画法:scatter

1
2
3
4
5
6
7
8
9
10
11
12
13
14
15
from matplotlib.colors import Colormap
import matplotlib.pyplot as plt
import numpy as np
n=1024
X=np.random.normal(0,1,n)
Y=np.random.normal(0,1,n)
T=np.arctan2(Y,X) # for color value
plt.scatter(X,Y,s=75,c=T,alpha=0.5) # 散点图
# plt.scatter(np.arange(5),np.arange(5))

plt.xlim((-1.5,1.5))
plt.ylim((-1.5,1.5))
plt.xticks(()) # 隐藏所有的ticks
plt.yticks(())
plt.show()

结果:

img

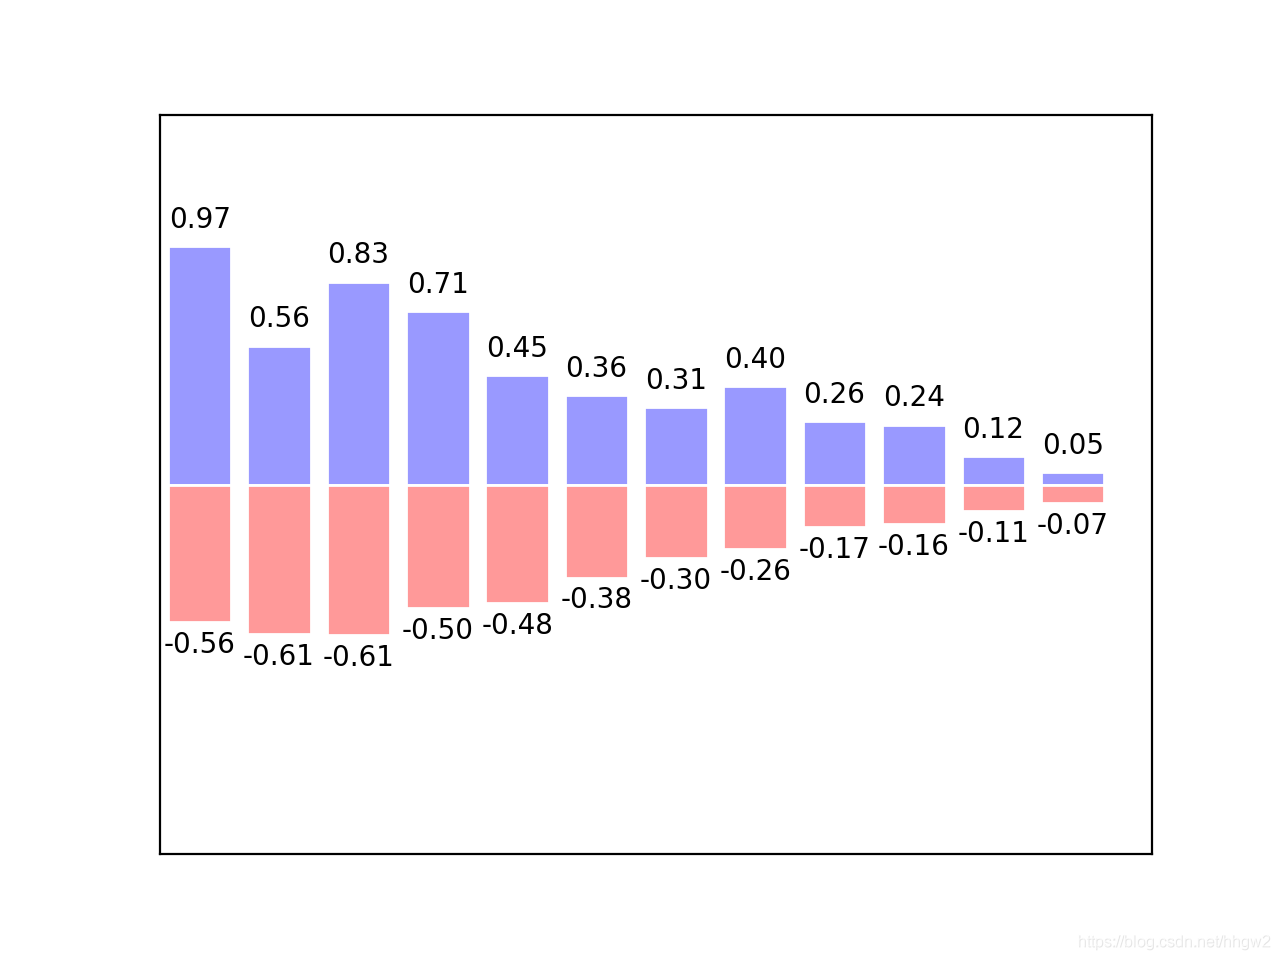
柱状图

1
2
3
4
5
6
7
8
9
10
11
12
13
14
15
16
17
18
19
20
21
22
23
24
import matplotlib.pyplot as plt
import numpy as np

n=12
X=np.arange(n)
Y1=(1-X/float(n))*np.random.uniform(0.5,1.0,n)
Y2=(1-X/float(n))*np.random.uniform(0.5,1.0,n)

plt.bar(X,+Y1,facecolor='#9999ff',edgecolor='white') # 向上的柱状图颜色
plt.bar(X,-Y2,facecolor='#ff9999',edgecolor='white') # 向下的柱状图颜色

for x,y in zip(X,Y1):
plt.text(x+0.0,y+0.05,'%.2f'%y,ha='center',va='bottom') # x位置,y位置,text内容,horizontal alignment横向对齐方式,纵向对齐方式

for x,y in zip(X,Y2):
plt.text(x+0.0,-y-0.15,'-%.2f'%y,ha='center',va='bottom')


plt.xlim((-.5,n))
plt.ylim((-1.5,1.5))
plt.xticks(()) # 隐藏所有的ticks
plt.yticks(())

plt.show()

效果:

img

等高线图 contour:

1
2
3
4
5
6
7
8
9
10
11
12
13
14
15
16
17
18
19
20
21
import matplotlib.pyplot as plt
import numpy as np

def f(x,y):
return(1-x/2+x**5+y**3)*np.exp(-x**2-y**2) # 计算(x,y)对应的“高度”的函数

n=256
x=np.linspace(-3,3,n)
y=np.linspace(-3,3,n)

X,Y = np.meshgrid(x,y) # 网格

plt.contourf(X,Y,f(X,Y),8,alpha=0.75,cmap=plt.cm.hot) # 往contour里面装颜色,8代表把等高线分成了10部分,cmap定义颜色的类型

C = plt.contour(X,Y,f(X,Y),8,colors='black',linewidth=0.5) # 画等高线的线
plt.clabel(C,inline=True,fontsize=10) # 画线的lable,画在线里面

plt.xticks(()) # 隐藏所有的ticks
plt.yticks(())

plt.show()

img

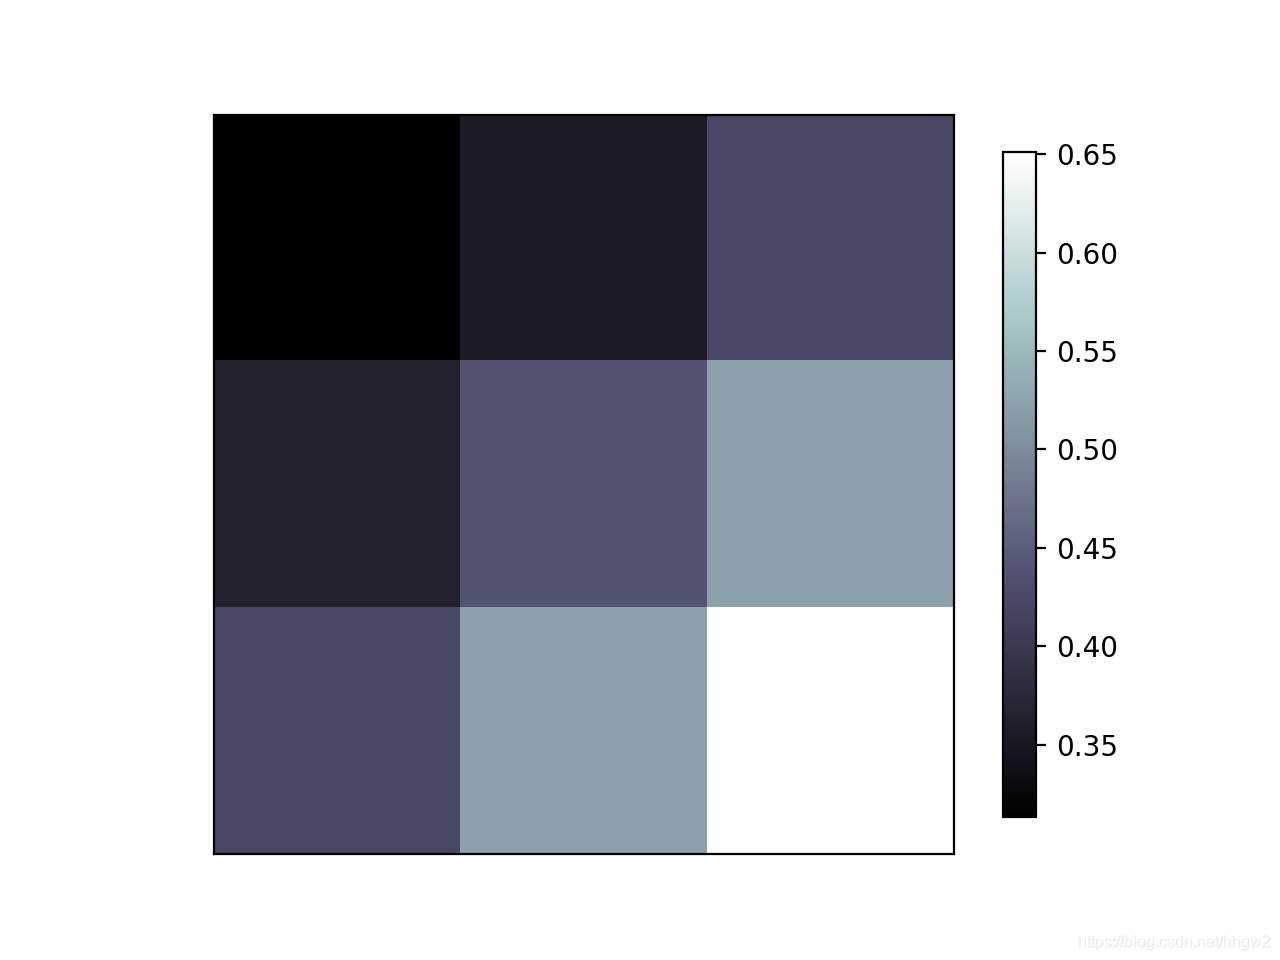
plt打印“图片”:

1
2
3
4
5
6
7
8
9
10
11
12
13
14
15
import matplotlib.pyplot as plt
import numpy as np

a=np.array([0.313,0.356,0.423,0.365,0.439,0.525,0.423,0.525,0.651]).reshape(3,3)

plt.imshow(a,interpolation='nearest',cmap=plt.cm.bone,origin='upper') # cmap='bone' 也可
# 'upper'代表从左上往右下打印
# interpolation可以去网站:http://matplotlib.org/examples/images_contours_and_fields/interpolation_methods.html

plt.colorbar(shrink=0.9) # 加了个colorbar

plt.xticks(()) # 隐藏所有的ticks
plt.yticks(())

plt.show()

img

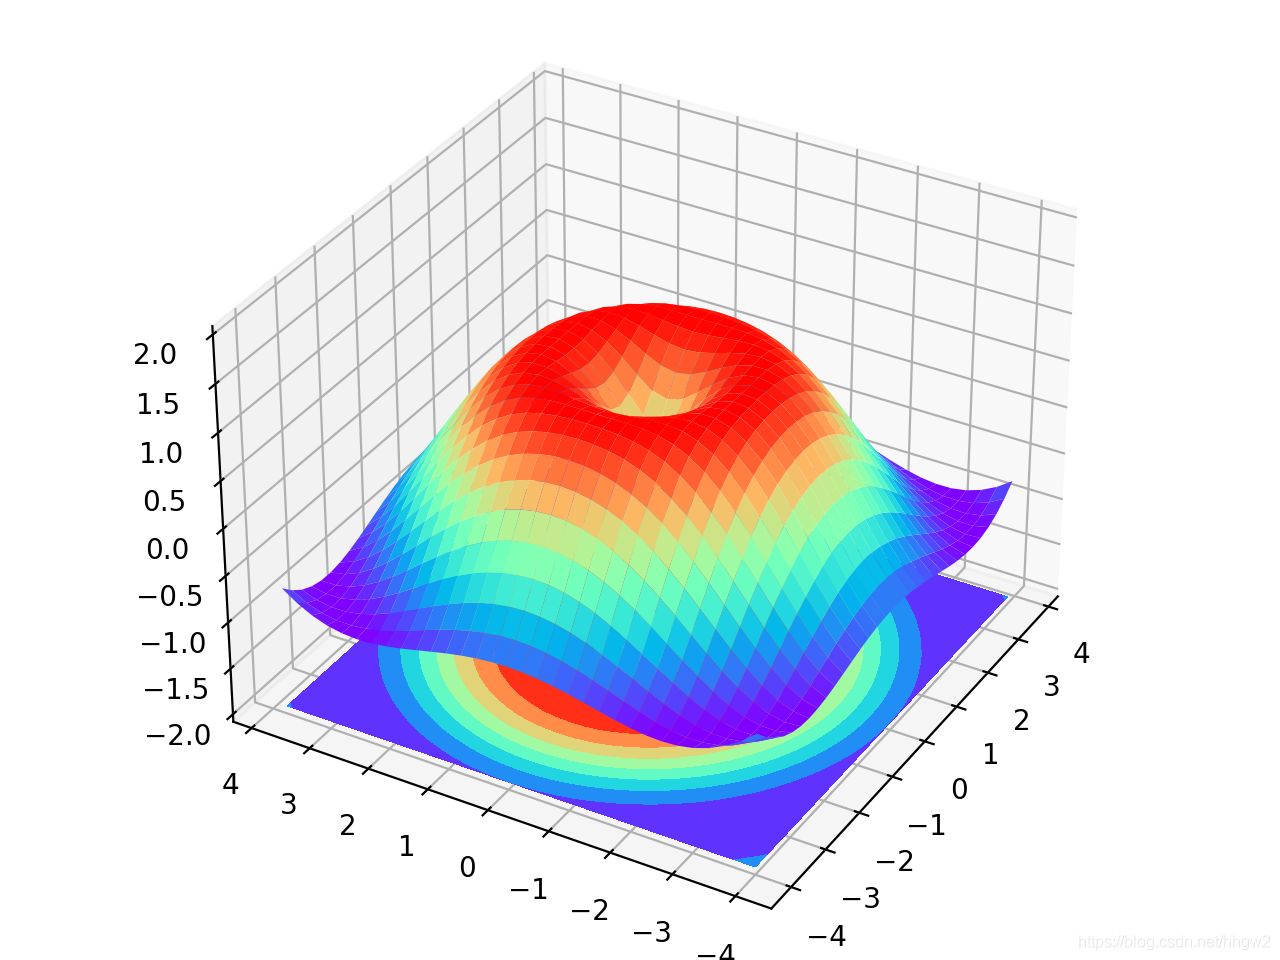
3D图像

1
2
3
4
5
6
7
8
9
10
11
12
13
14
15
16
17
18
19
import matplotlib.pyplot as plt
import numpy as np
from mpl_toolkits.mplot3d import Axes3D

fig = plt.figure()
ax = Axes3D(fig)

X = np.arange(-4, 4, 0.25)
Y = np.arange(-4, 4, 0.25)
X, Y = np.meshgrid(X, Y) # 把x,y弄到底面的面上去
R = np.sqrt(X ** 2 + Y ** 2)
Z = np.sin(R) # Z的计算方法

ax.plot_surface(X,Y,Z,rstride=1,cstride=1,cmap=plt.get_cmap('rainbow'))
# rstride 、cstride 跨度
ax.contourf(X,Y,Z,zdir='z',offset=-2,cmap='rainbow') # zdir='z'代表把立体图像压到z轴,offset=-2代表压到z为-2的那个平面
ax.set_zlim(-2,2) # 设置坐标轴的高度范围

plt.show()

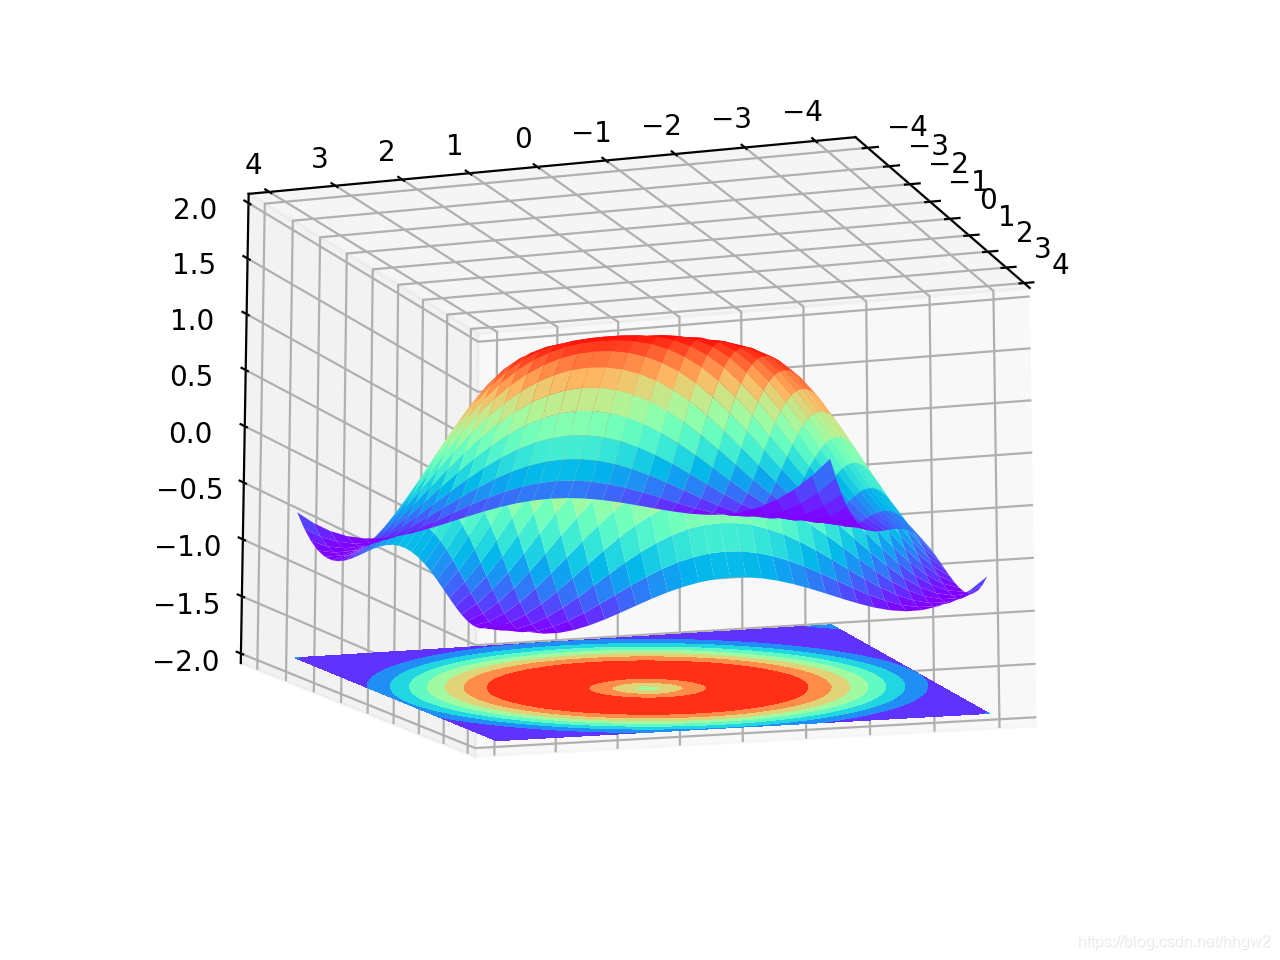
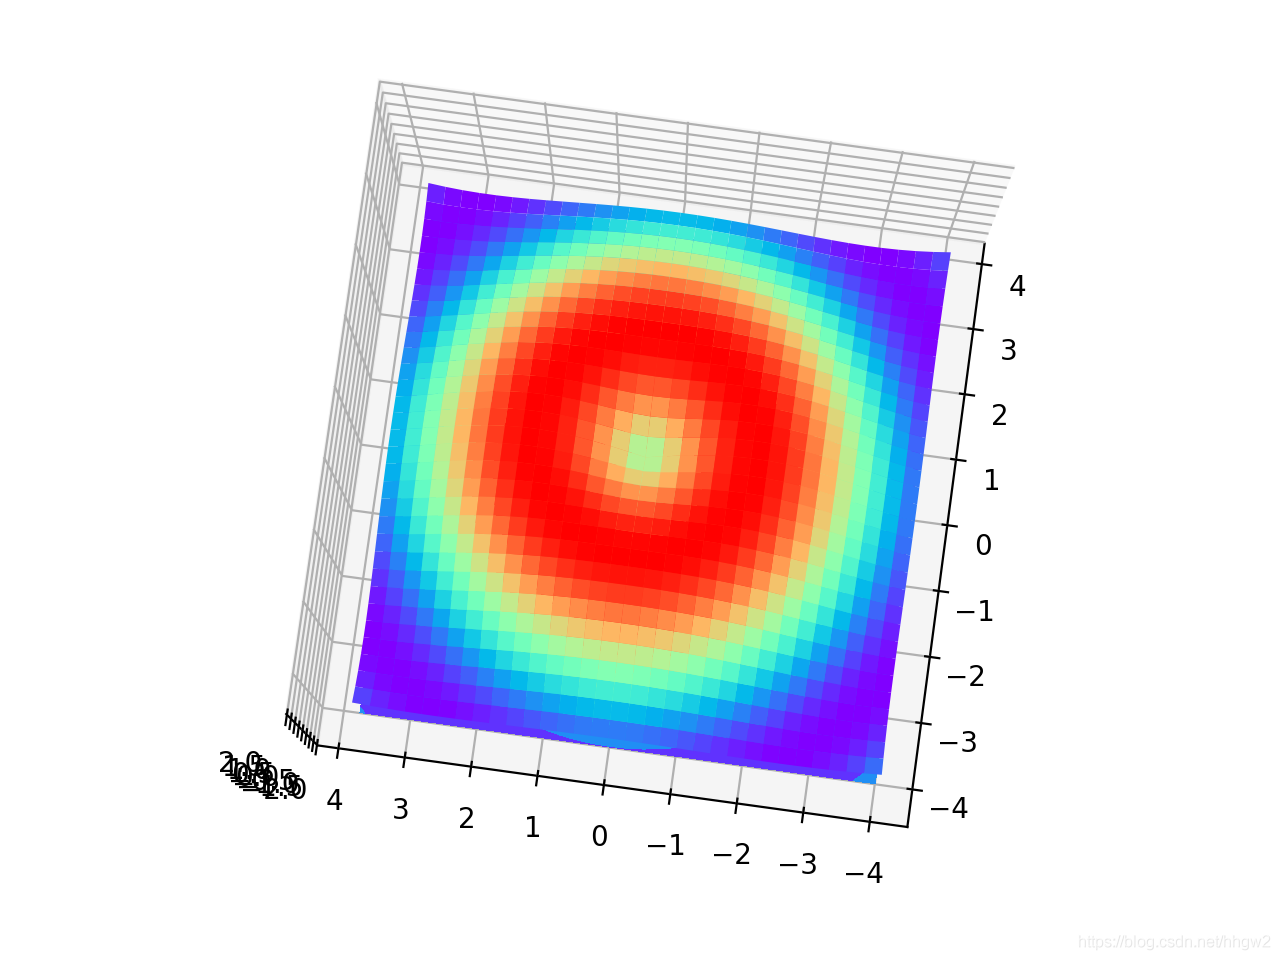
效果:

img
img
img

在同一个figure里面分区画图:

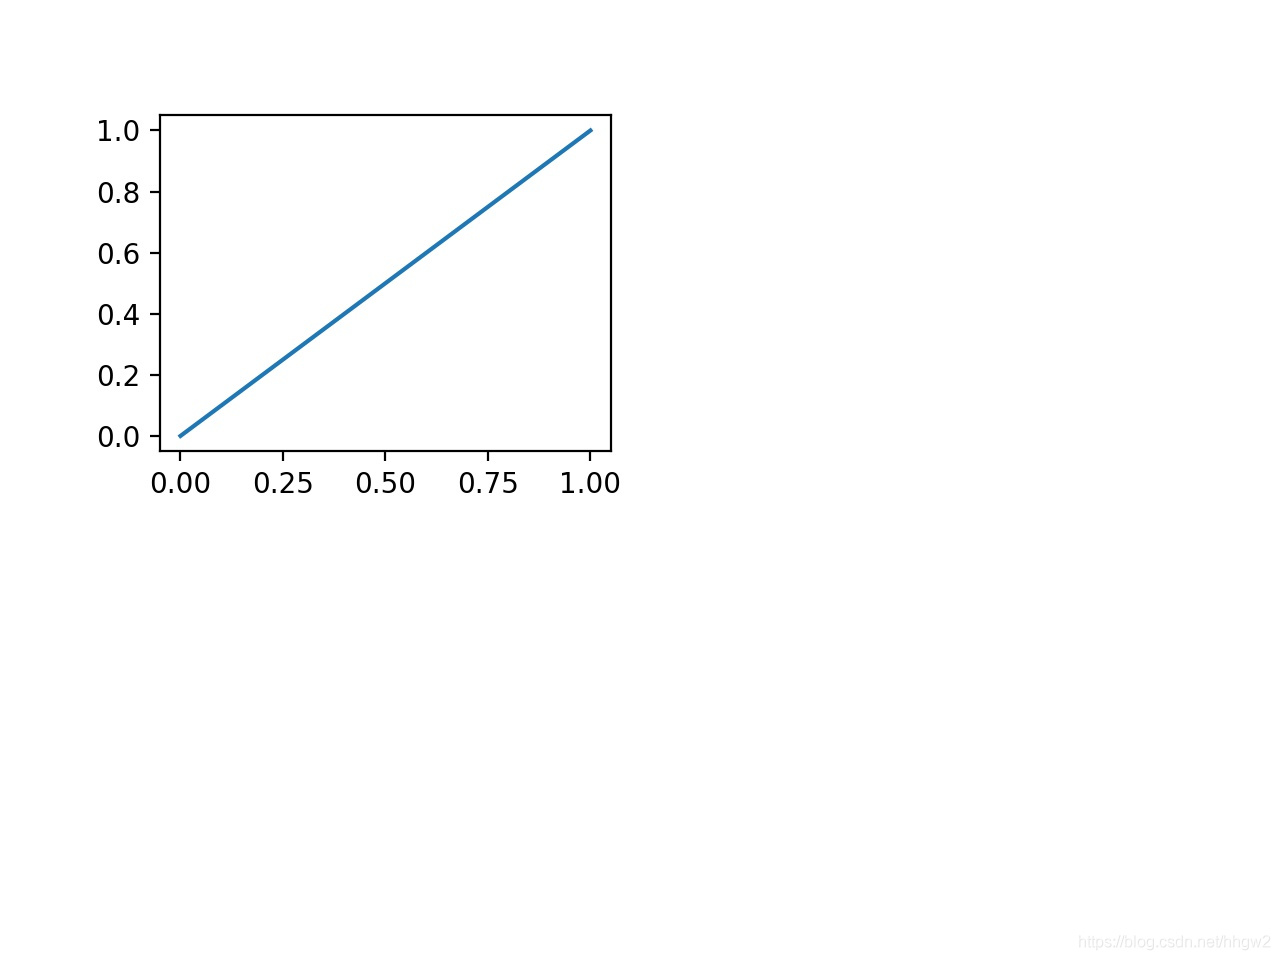
首先看一下如何分区,画一个简单的(0,0)到(1,1)的图:

1
2
3
4
5
6
7
import matplotlib.pyplot as plt

plt.figure()
plt.subplot(2,2,1) # figure中创建小图,两行两列,在第一个位置plot上东西
plt.plot([0,1],[0,1])

plt.show()

效果:

img

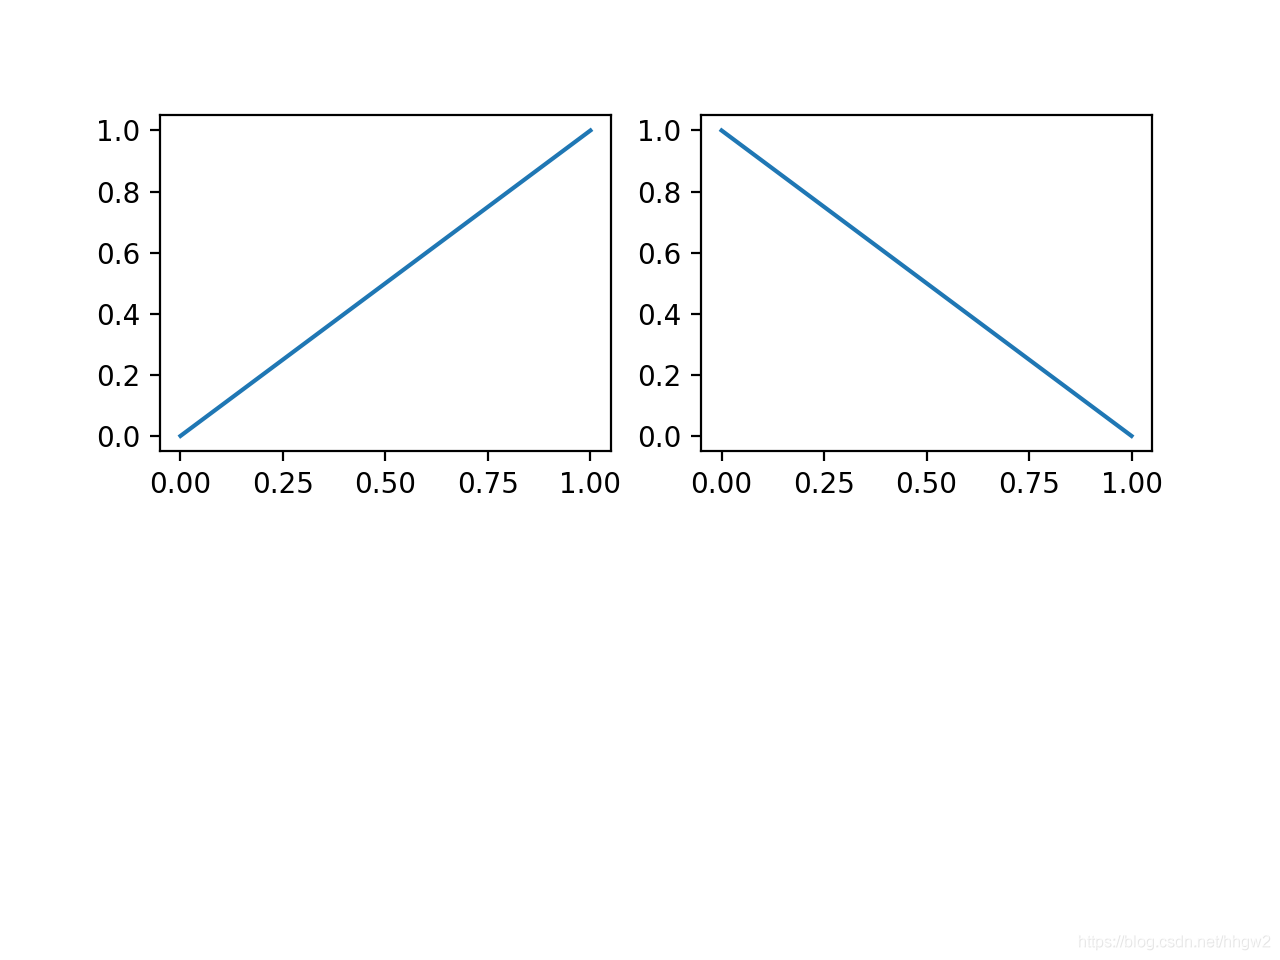
同样,我们来添加第二张图:

1
2
3
4
5
6
7
8
9
import matplotlib.pyplot as plt

plt.figure()
plt.subplot(2,2,1) # figure中创建小图,两行两列,在第一个位置plot上东西
plt.plot([0,1],[0,1])
plt.subplot(2,2,2) # figure中创建小图,两行两列,在第二个位置plot上东西
plt.plot([1,0],[0,1])

plt.show()

就成了这个样子:

img

#subplot()里面的逗号省略了也可以识别哦😯

那么如何调整四个subplot的布局?

1
2
3
4
5
6
7
8
9
10
11
12
13
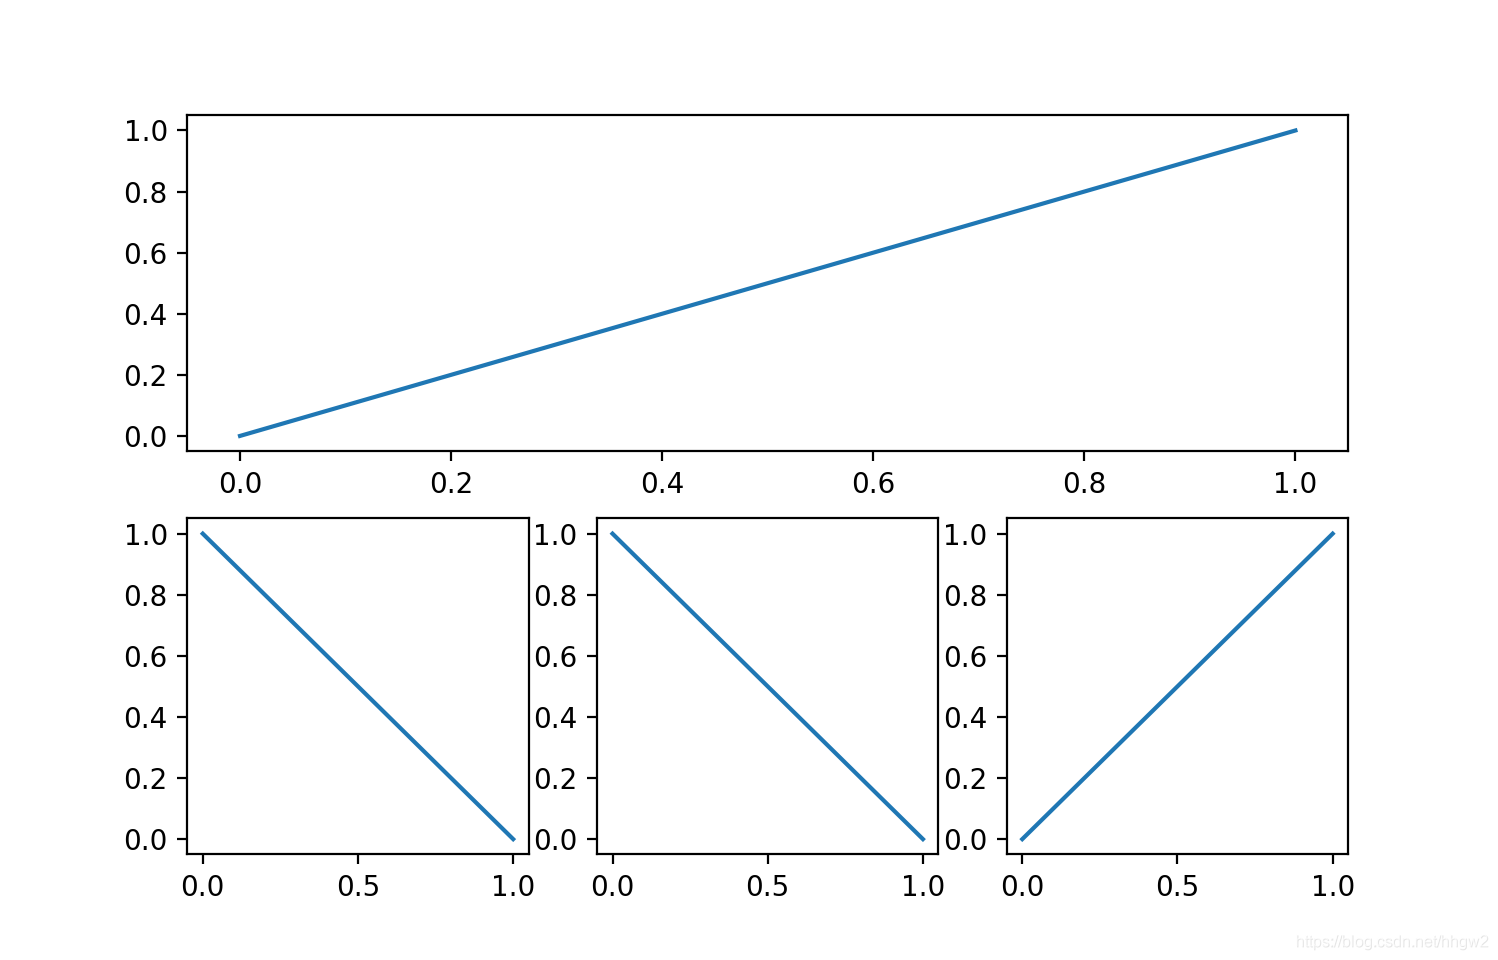
import matplotlib.pyplot as plt

plt.figure()
plt.subplot(2, 1, 1) # figure中创建小图,两行一列,在第一个位置plot上东西
plt.plot([0, 1], [0, 1])
plt.subplot(2, 3, 4) # figure中创建小图,两行三列,在第4个位置plot上东西
plt.plot([1, 0], [0, 1])
plt.subplot(2, 3, 5) # figure中创建小图,两行三列,在第5个位置plot上东西
plt.plot([1, 0], [0, 1])
plt.subplot(2, 3, 6) # figure中创建小图,两行三列,在第6个位置plot上东西
plt.plot([0, 1], [0, 1])

plt.show()

效果:

img

subplot分格显示的三种方法:

1、plt.subplot2grid()

1
2
3
4
5
6
7
8
9
10
11
12
13
14
15
16
17
18
19
20
21
22
23
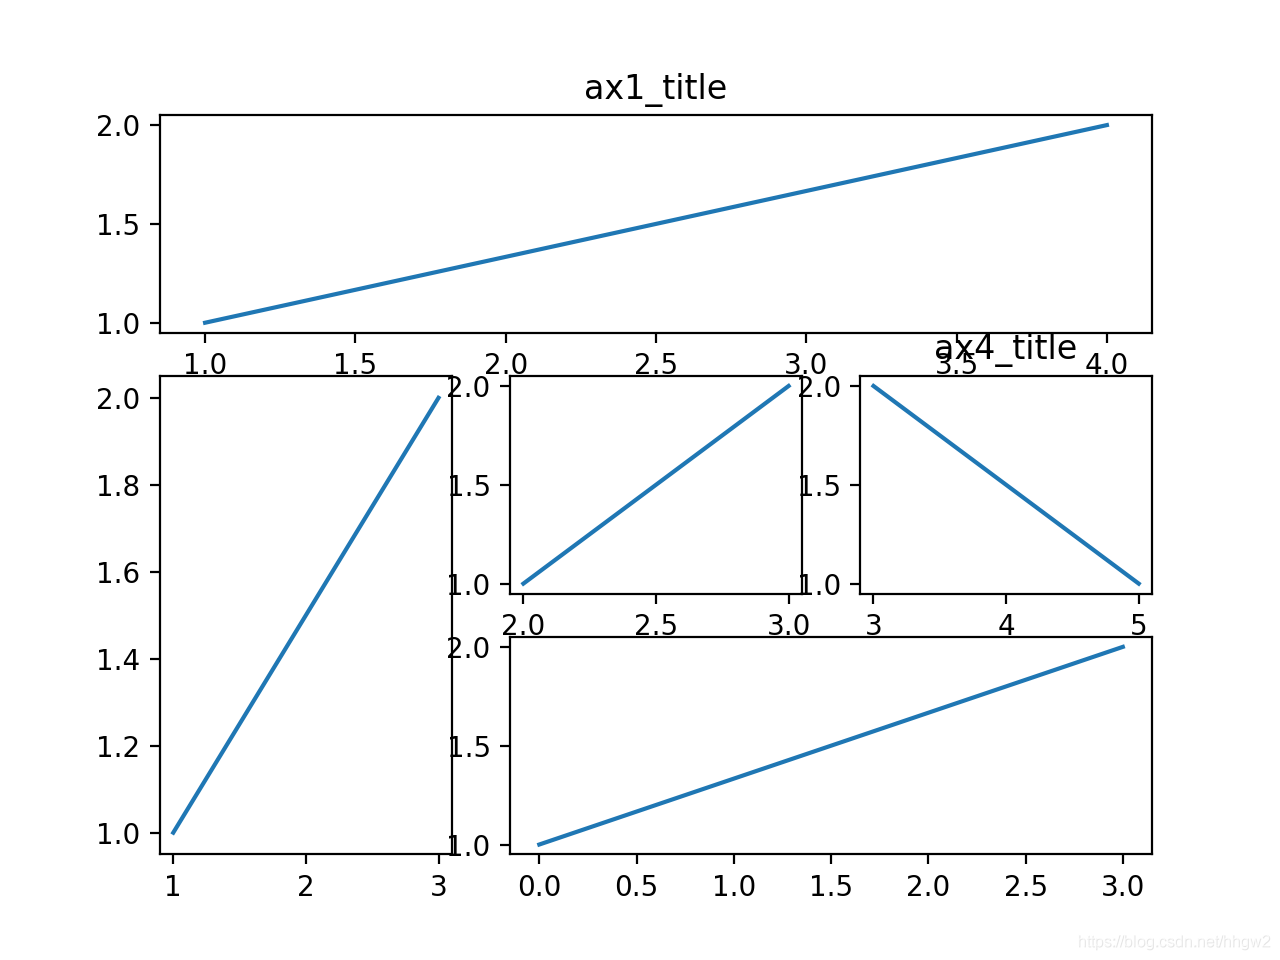
# method 1
import matplotlib.pyplot as plt

plt.figure()

ax1=plt.subplot2grid((3,3),(0,0),colspan=3,rowspan=1) # (3,3) 的划分,(0,0)开始画,列跨度为3,行跨度为1(默认)
ax1.plot([1,4],[1,2])
ax1.set_title('ax1_title')

ax2=plt.subplot2grid((3,3),(1,0),colspan=1,rowspan=2)
ax2.plot([1,3],[1,2])

ax3=plt.subplot2grid((3,3),(1,1),colspan=1,rowspan=1)
ax3.plot([2,3],[1,2])

ax4=plt.subplot2grid((3,3),(1,2),colspan=1,rowspan=1)
ax4.plot([5,3],[1,2])
ax4.set_title('ax4_title')

ax5=plt.subplot2grid((3,3),(2,1),colspan=2,rowspan=1)
ax5.plot([0,3],[1,2])

plt.show()

效果:

img

2、import matplotlib.gridspec as gridspec

1
2
3
4
5
6
7
8
9
10
11
12
13
14
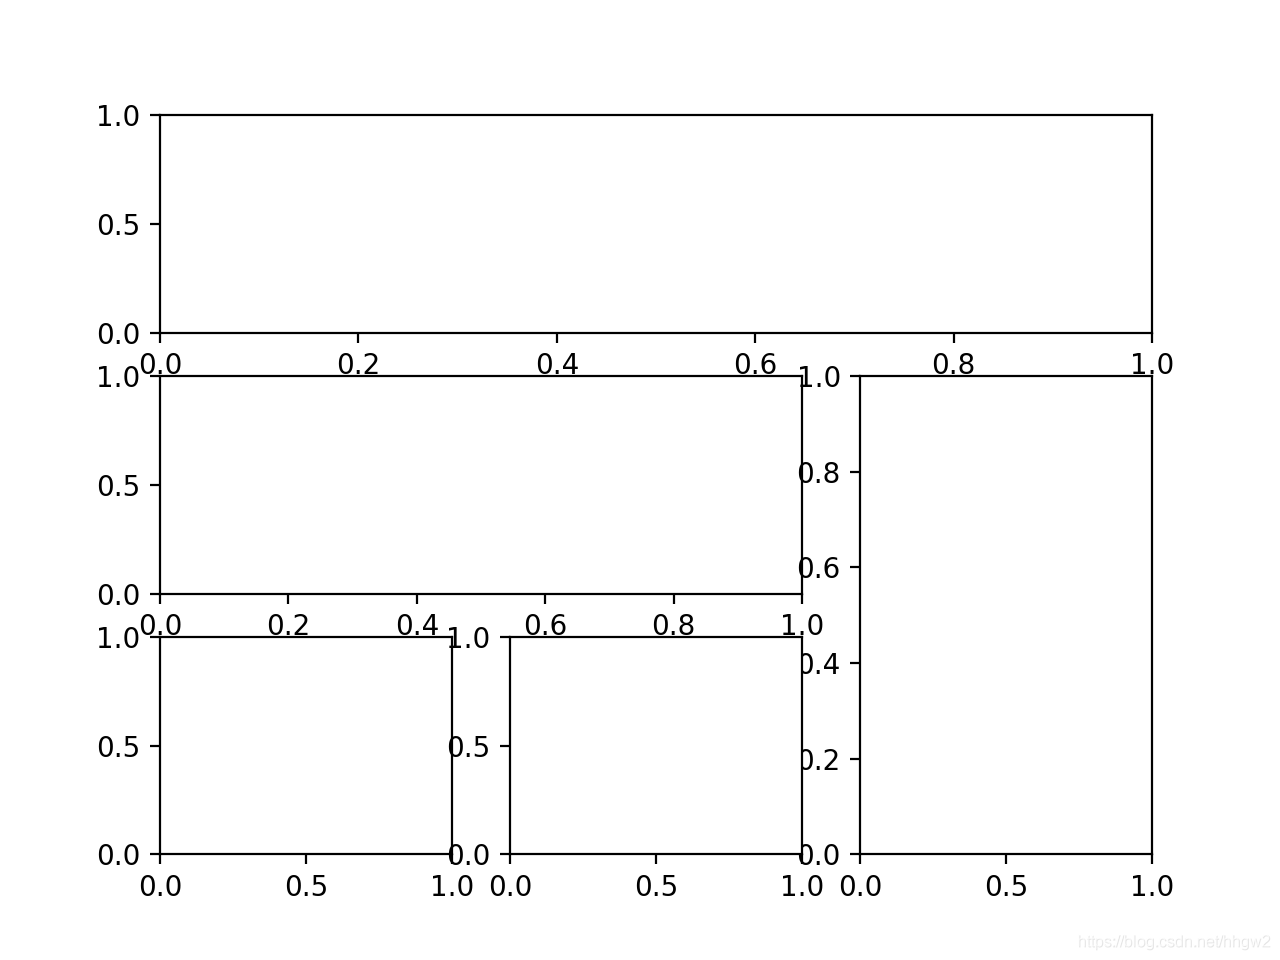
# method 2
import matplotlib.pyplot as plt
import matplotlib.gridspec as gridspec

plt.figure()
gs=gridspec.GridSpec(3,3)

ax1=plt.subplot(gs[0,:])
ax2=plt.subplot(gs[1,:2])
ax3=plt.subplot(gs[1:,2])
ax4=plt.subplot(gs[-1,0])
ax5=plt.subplot(gs[-1,-2])

plt.show()

效果:

img

3、subplots

1
2
3
4
5
6
7
8
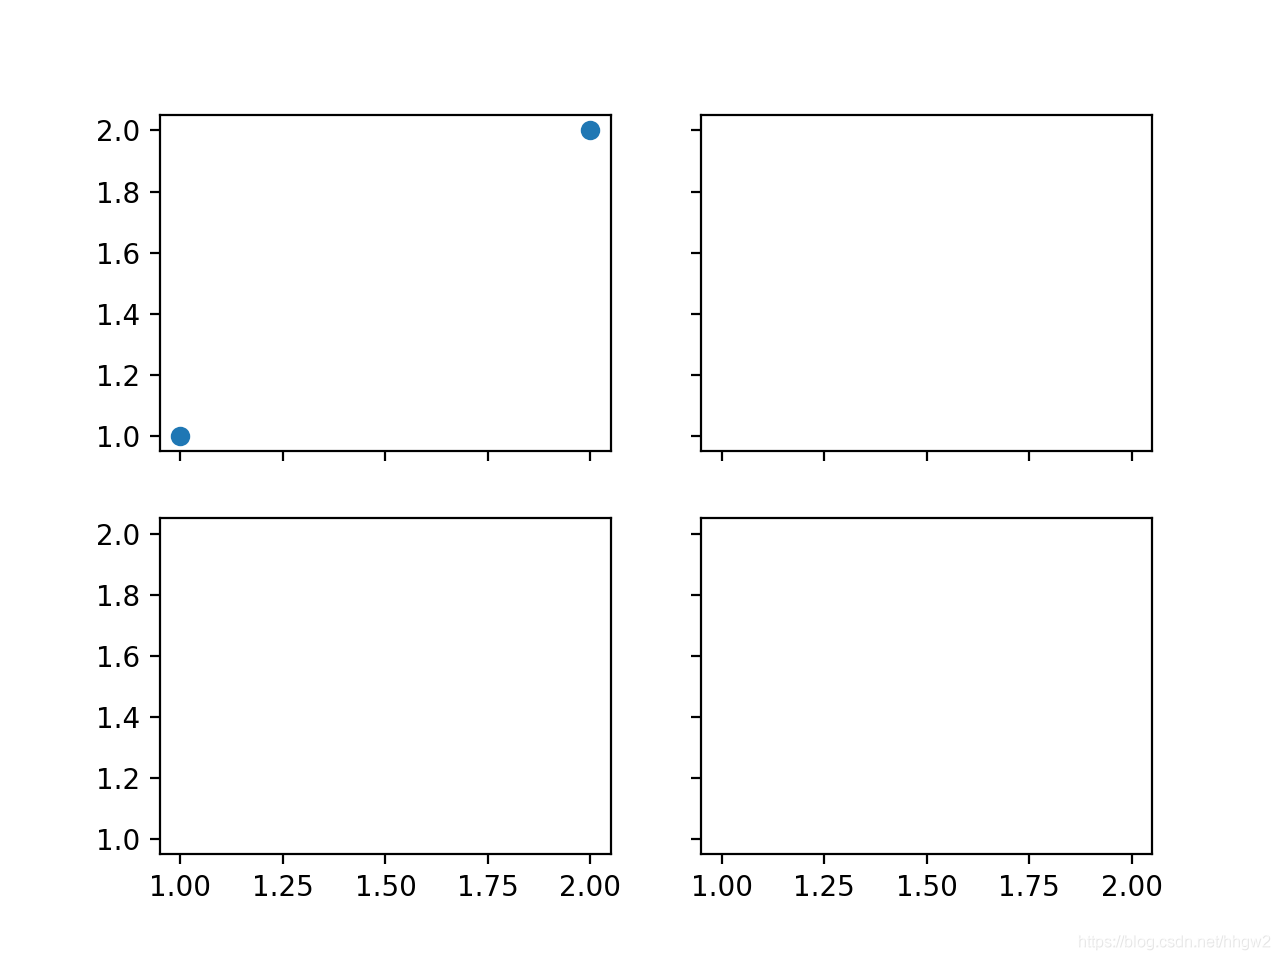
# method 3
import matplotlib.pyplot as plt
import matplotlib.gridspec as gridspec

f,((ax11,ax12),(ax21,ax22))=plt.subplots(2,2,sharex=True,sharey=True)
ax11.scatter([1,2],[1,2])

plt.show()

img

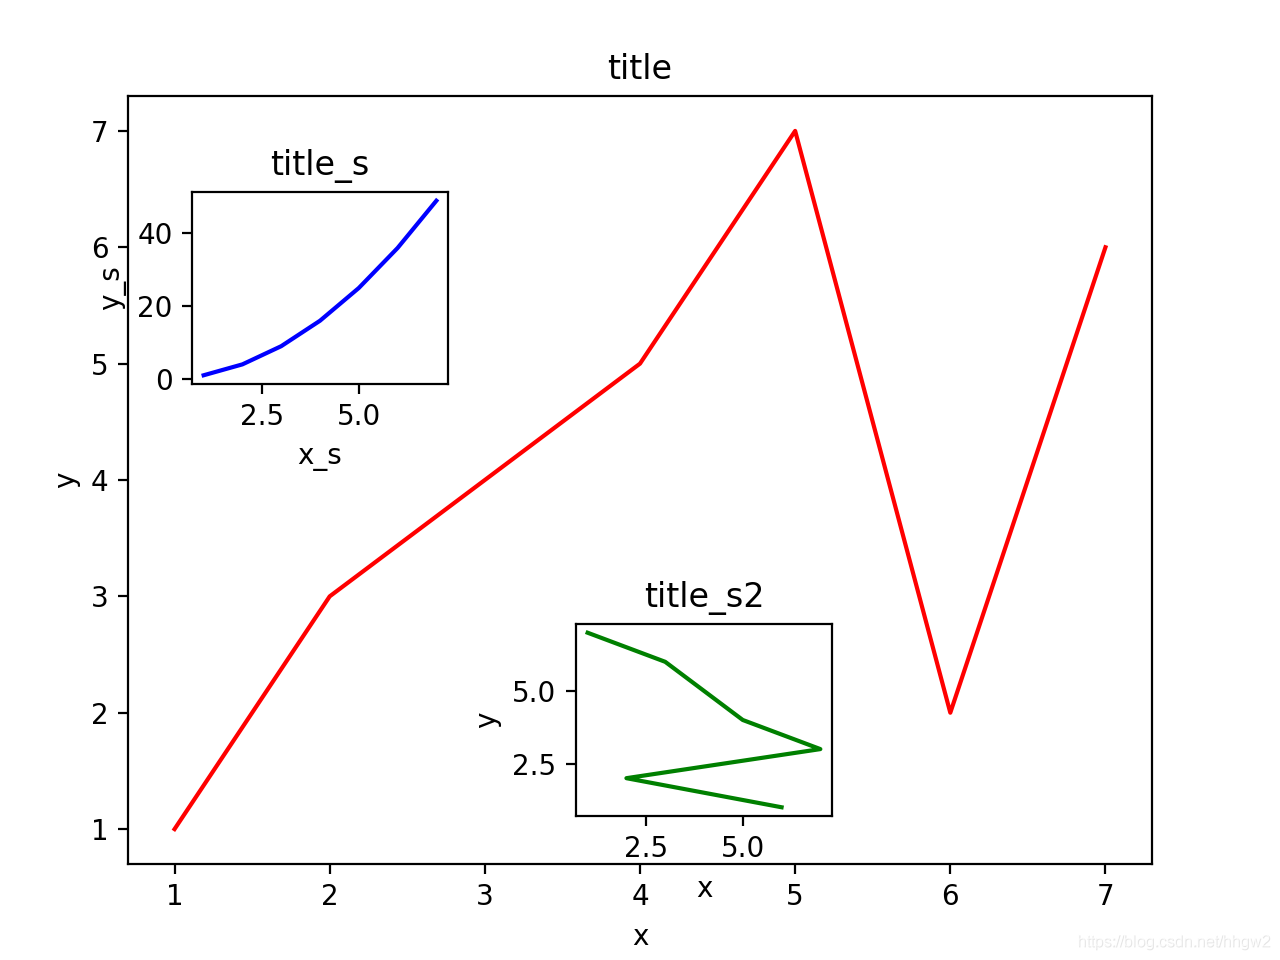
图中图–【会ps的完全没必要学系列】

1
2
3
4
5
6
7
8
9
10
11
12
13
14
15
16
17
18
19
20
21
22
23
24
25
26
27
28
29
30
# method 3
import matplotlib.pyplot as plt
import matplotlib.gridspec as gridspec

fig = plt.figure()
x = [1, 2, 3, 4, 5, 6, 7]
y = [1, 3, 4, 5, 7, 2, 6]
# 先画个大图
left, bottom, width, height = 0.1, 0.1, 0.8, 0.8
ax1 = fig.add_axes([left, bottom, width, height])
ax1.plot(x, y, "r")
ax1.set_xlabel("x")
ax1.set_ylabel("y")
ax1.set_title("title")

# 大图里面加个小图
left, bottom, width, height = 0.15, 0.6, 0.2, 0.2
ax2 = fig.add_axes([left, bottom, width, height])
ax2.plot(x, list(map(lambda x: x ** 2, x)), "b")
ax2.set_xlabel("x_s")
ax2.set_ylabel("y_s")
ax2.set_title("title_s")

plt.axes([0.45, 0.15, 0.2, 0.2]) # 第二种写法,就不需要弄ax2这种东西了,但是一个plt.axes只管它下面跟着的这一串
plt.plot(y[::-1],x,'g')
plt.xlabel('x')
plt.ylabel('y')
plt.title('title_s2')

plt.show()

效果:

img

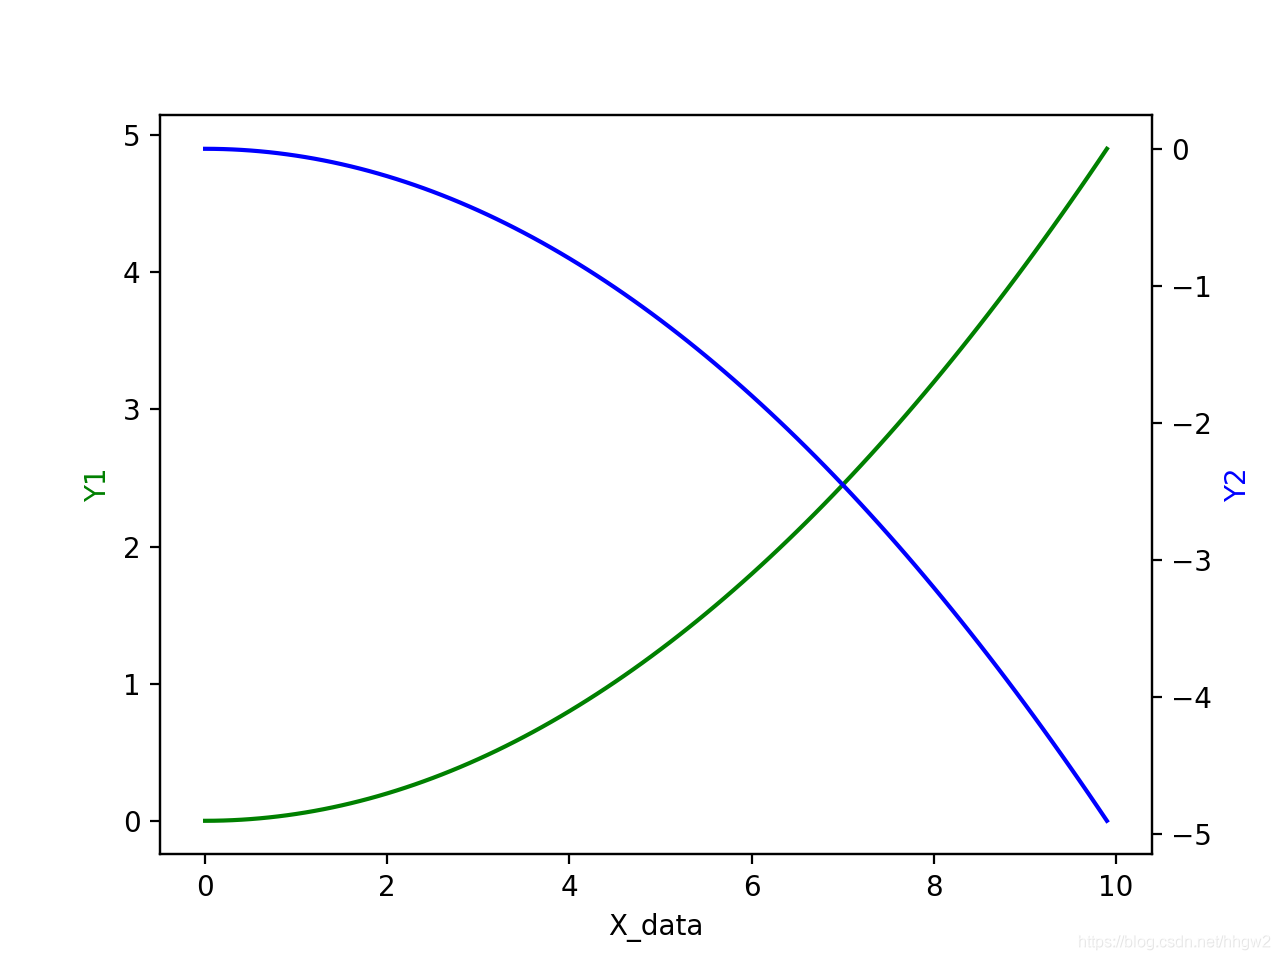
主次坐标轴:

1
2
3
4
5
6
7
8
9
10
11
12
13
14
15
16
17
18
# method 3
import matplotlib.pyplot as plt
import numpy as np

x=np.arange(0,10,0.1)
y1=0.05*x**2
y2=-1*y1

fig,ax1=plt.subplots()
ax2=ax1.twinx() # ax2坐标轴是ax1镜面的
ax1.plot(x,y1,'g-')
ax2.plot(x,y2,'b-')

ax1.set_xlabel('X_data')
ax1.set_ylabel('Y1',color='g')
ax2.set_ylabel('Y2',color='b')

plt.show()

效果:

img

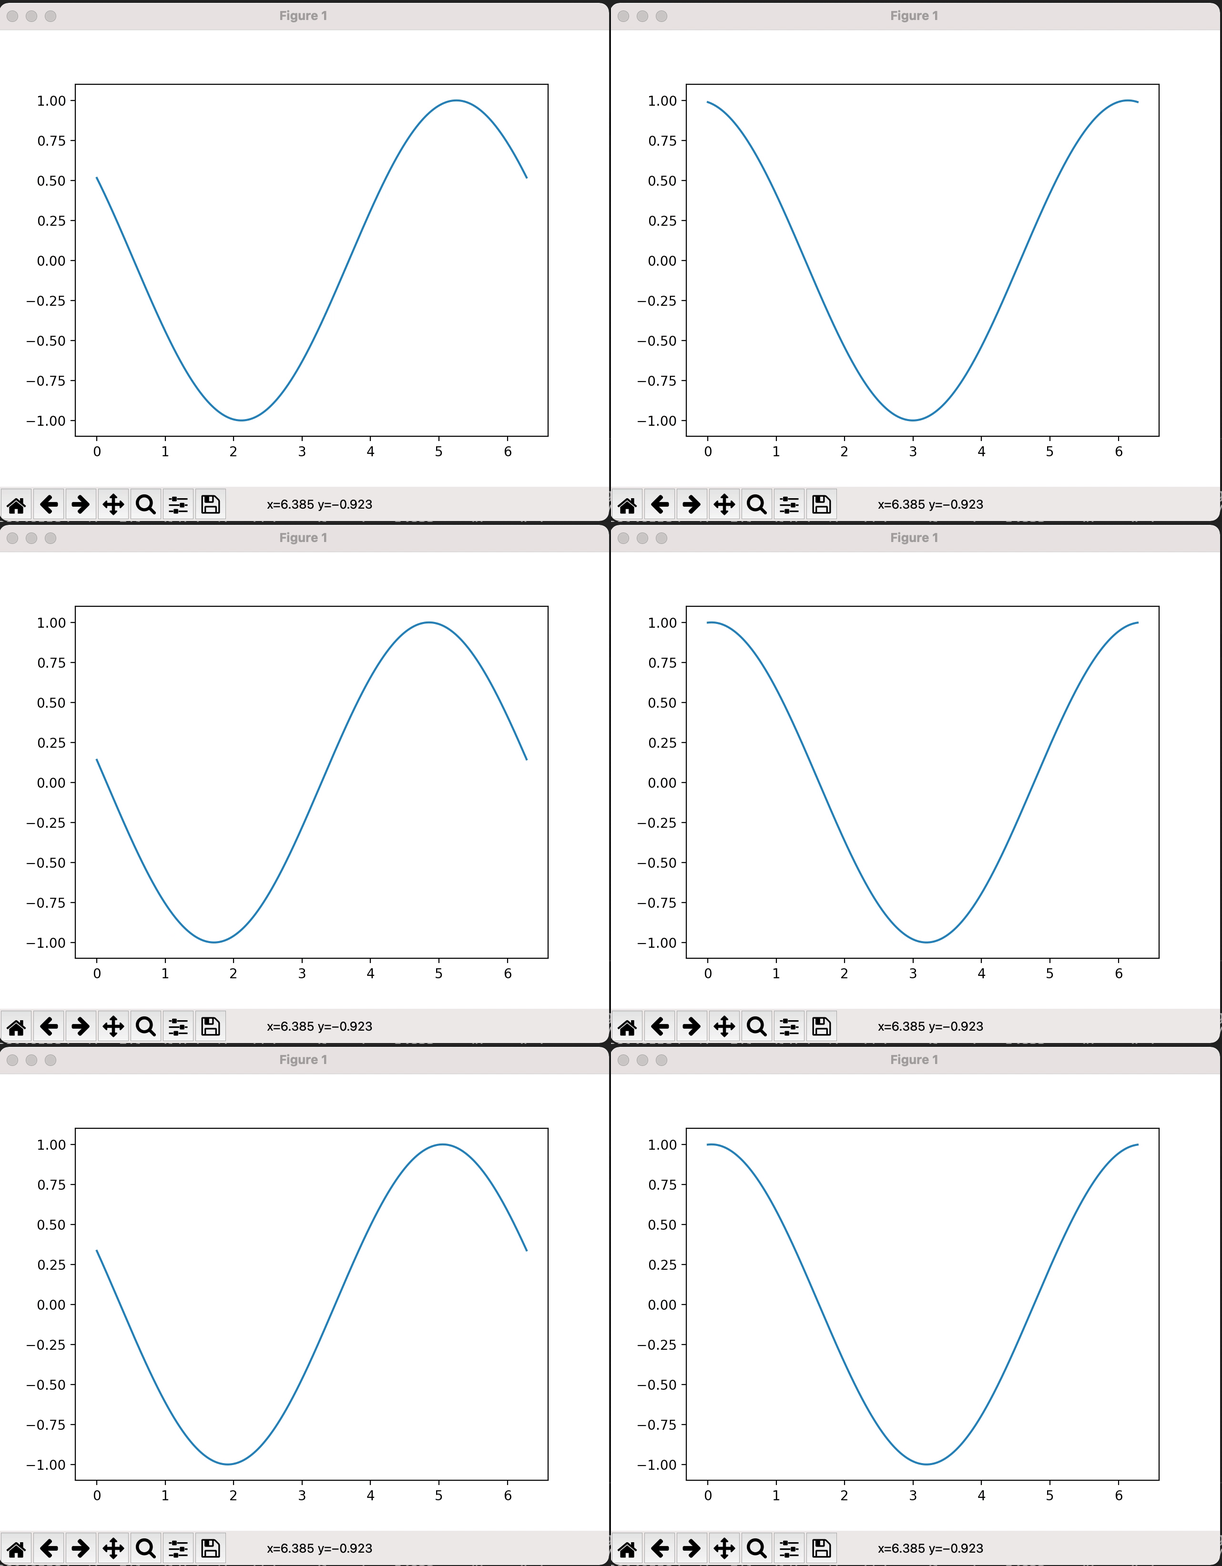
让plt动起来!

先上效果:

img

代码:

1
2
3
4
5
6
7
8
9
10
11
12
13
14
15
16
17
18
19
20
21
22
import numpy as np
from matplotlib import pyplot as plt
from matplotlib import animation
#动画的模块

fig,ax=plt.subplots()

x=np.arange(0,2*np.pi,0.01)
line,=ax.plot(x,np.sin(x))

def animate(i):
line.set_ydata(np.sin(x+i/10))
return line,

def init():
line.set_ydata(np.sin(x))
return line,


ani=animation.FuncAnimation(fig=fig,func=animate,frames=100,init_func=init,interval=20,blit=False) # frames=100帧 ;blit=True只刷新变化的点,mac只能用false

plt.show()

可惜坐标轴不会动